Knowing how to sharpen serrated knives is essential for clean cuts and maintaining your kitchen tools. Serrated knives feature specific teeth that require maintenance, unlike straight-edged knives. We’ll walk you through every step of keeping your blades razor-sharp in this guide. Gaining proficiency in this area can improve your cooking abilities and make meal preparation easier for both home cooks and professional chefs. Let’s dive in and learn how to sharpen serrated knives.
Benefits of Maintaining Sharp Serrated Knives
- Efficiency: Sharp knives reduce the effort needed to cut through food, making your cooking experience more enjoyable.
- Safety: Because it takes less effort to use and lowers the chance of slipping and getting hurt, a sharp knife is safer.
- Longevity: By ensuring that your serrated knives receive regular maintenance, you can extend their lifespan and ultimately save money.
Understanding Serrated Knives
To properly sharpen a serrated knife, it’s crucial to understand its anatomy and types.
Anatomy of a Serrated Knife:
- Serrations: The sharp teeth that along the length of the blade.
- Gullets: The spaces between the serrations that help catch and cut through food.
- Scallops: The curved indentations between the serrations.
Types of Serrated Knives and Their Uses:
- Bread Knives: Perfect for cutting bread without breaking it.
- Utility Knives: Versatile and suitable for cutting through a variety of foods.
- Steak Knives: Perfect for cutting through cooked meats.
Tools Needed for Sharpening Serrated Knives

To effectively sharpen your serrated knives, you’ll need a few essential tools:
Essential Sharpening Tools:
- Ceramic Sharpening Rod: Perfect for working on individual serrations.
- Honing Rod: Keeps your knife edge aligned and sharp.
- Diamond-Coated Sharpening Rod: Offers a more aggressive sharpening action.
Optional Tools:
- Sharpening Stone with a Pointed Edge: Useful for minor touch-ups.
- Electric Serrated Knife Sharpener: Quick and efficient for those less confident in manual sharpening.
Preparing to Sharpen Your Serrated Knife
Before diving into the sharpening process, it’s essential to thoroughly prepare your workspace and knife to ensure a smooth and safe experience:
Safety Precautions:
- Wear Cut-Resistant Gloves: Keep your hands safe from unintentional cuts and scrapes. These gloves are made to offer an additional degree of protection without sacrificing control or dexterity.
- Work in a Well-Lit Area: To prevent errors, make sure you can clearly understand what you’re doing. Good lighting reduces the risk of errors and ensures you can accurately assess the knife’s edge as you work.
Cleaning the Knife Before Sharpening:
- Wash and Dry Thoroughly: Use soap and warm water to remove any food particles, grease, or residue. To keep moisture from affecting the sharpening process and to stop rust from forming, thoroughly dry the knife with a fresh towel.
Securing the Knife for a Stable Sharpening Process:
- Use a Knife Clamp or Holder: Keep the knife steady to avoid slips and ensure consistent sharpening angles. A stable knife prevents accidents and allows you to apply even pressure along the blade, resulting in more precise and effective sharpening. If you don’t have a clamp or holder, use a non-slip mat or a towel underneath the knife to provide some stability.
Step-by-Step Guide to Sharpening Serrated Knives

It’s time to start sharpening your serrated knife now that you have made all the required preparations and have the required instruments!
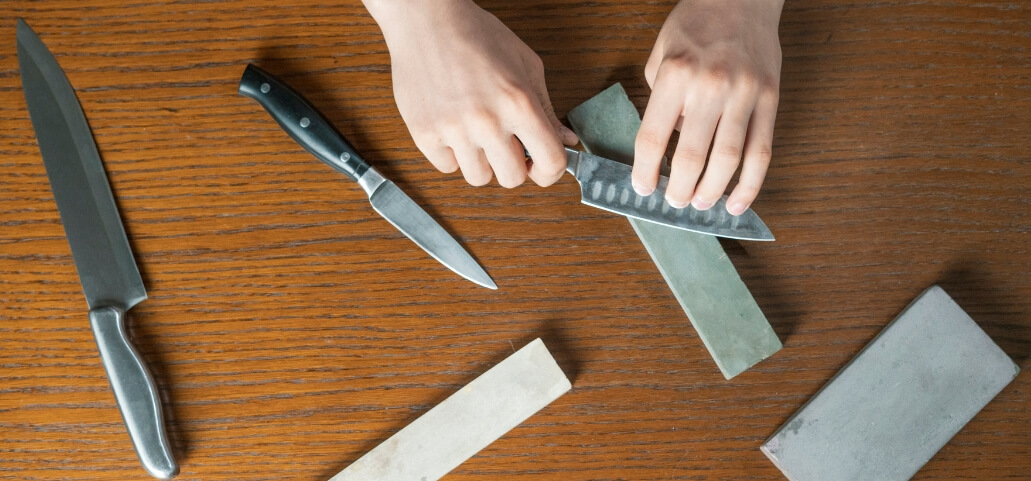
Method 1: Using a Ceramic Sharpening Rod
- Step 1: Select the Right Rod Size for Your Knife’s Serrations: Ensure the rod fits snugly into the serrations. The size of the rod should be appropriate to match the depth and width of the serrations for effective sharpening.
- Step 2: Insert the Rod into Each Serration: Slowly and carefully guide the rod into each serration to avoid any damage to the knife. Take your time to position it correctly.
- Step 3: Sharpen Each Serration Individually: Use a gentle back-and-forth motion to sharpen each serration. For uniform sharpening, make careful to keep the angle constant throughout.
- Step 4: Check for Burrs and Remove Them: After sharpening, feel for any rough edges or small burrs on the knife’s serrations. Gently remove them using the rod to ensure a smooth and sharp edge.
Method 2: Using a Diamond-Coated Sharpening Rod
- Step 1: Advantages of Using Diamond-Coated Rods: Diamond-coated rods are more durable and effective for tougher sharpening tasks. They can handle harder materials and provide a finer edge, making them a preferred choice for professional chefs and serious home cooks.
- Step 2: Technique for Sharpening with a Diamond Rod: The technique for sharpening with a diamond rod is similar to using a ceramic rod but requires a stronger, more abrasive touch. Start by holding the rod at a consistent angle, then glide the knife along the rod from the base to the tip, applying moderate pressure. To get a sharp, polished edge, do this numerous times on both sides of the blade.
Method 3: Using an Electric Serrated Knife Sharpener
Step 1: Choosing the Right Electric Sharpener: Ensure it’s designed for serrated knives. Look for a sharpener with high-quality materials and good reviews to ensure it will maintain the integrity of your knives.
Step 2: Step-by-Step Instructions for Using the Electric Sharpener:
- Insert the Knife First: To keep the blade from getting damaged, strictly follow the manufacturer’s instructions. Make sure the knife is aligned properly with the sharpener.
- Pass the Knife Through Slowly: Allow the machine to do the work. Move the knife steadily to ensure an even sharpening process, avoiding any rush which might lead to uneven sharpening. Repeat as necessary, following the recommended number of passes.
Caring for Your Sharpened Serrated Knife
Your sharpened serrated knife must be properly maintained and cared for to remain in excellent working order. Take into account the following tips to maintain it sharp:
- Store it Safely: To preserve the edge, put your knife away after use in a sheath or blade guard. Avoid cluttered drawers or other utensils that may cause damage.
- Clean and Dry Thoroughly: To avoid rust, thoroughly clean and dry your knife after each use. Regularly oil the blade and handle to keep them in good shape.
- Hone Regularly: Even with proper storage and cleaning, a knife’s edge will dull over time. Regularly sharpen the blade with a ceramic tool or honing rod to keep it that way.
With these tips, you can easily sharpen your serrated knives at home and keep them in top condition for all your cooking needs. Always prioritize safety by following the steps carefully and using the right tools.
How to Sharpen Serrated Knives with Electric Sharpeners?
You can use an electric sharpener to sharpen a serrated knife by doing the following:
- Step 1: Prepare Your Knife and Workspace: Make sure the knife is completely clean to get rid of any residue, oil, or food fragments. Make sure there are no distractions and that your workspace is well-lit.
- Step 2: Insert the Knife into the Sharpener: Pay close attention to the manufacturer’s directions. Place the knife in position, making sure it’s aligned correctly and securely.
- Step 3: Adjust the Angle Guide: Most electric sharpeners have an angle guide that allows you to set the correct angle for your knife. Consult the manual and adjust as needed.
- Step 4: Turn on the Sharpener and Pass the Knife Through Slowly: Turn on the machine and gently pass the knife through, maintaining a consistent speed. Repeat this process several times, following the recommended number of passes for your knife’s level of dullness.
- Step 5: Check and Test Your Knife: After sharpening, check for any rough edges or burrs on the serrations. If necessary, use a honing rod to remove them. Next, make sure the cut is clean and smooth by testing the sharpness by cutting through a piece of paper or a tomato.
Additional Tips for Maintaining Your Knives
While sharpening is crucial for maintaining your knives, these additional tips can help prolong their lifespan:
- Avoid Using Dishwashers: High heat and harsh chemicals in dishwashers can dull and corrode blades. After hand washing in warm, soapy water, quickly dry off.
- Use a Cutting Board: Hard surfaces like countertops or plates can quickly dull blades. Always use a cutting board.
- Avoid Excessive Force: Let the knife do the work. Excessive force can bend or break the blade and make sharpening harder.
- Regularly Inspect for Damage: Check for chips or cracks regularly. If you find any, stop using the knife and have it repaired.
By following these tips and sharpening regularly, your serrated knives will stay sharp and effective for all your cooking needs.
Common Mistakes to Avoid When Sharpening Serrated Knives
- Using the Wrong Sharpener: It is possible to harm and further dull a serrated knife by using a sharpener not intended for such purposes.
- Not Holding a Consistent Angle: Uneven sharpening angles can result in an uneven edge, making your knife less effective.
- Skipping Steps or Rushing the Process: Proper sharpening takes time and patience. Skipping steps or rushing can lead to an ineffective edge and even damage the blade.
- Not Cleaning and Maintaining Tools: A dirty or damaged sharpener can affect the quality of the sharpening process.
Remember to always take your time, follow instructions carefully, and properly maintain your tools for the best results when sharpening serrated knives.
Conclusion
While sharpening serrated knives may appear difficult at first, with the correct information and equipment, it is a chore that can be accomplished with ease and satisfaction. Your cherished kitchen knives will last longer with regular maintenance, which also guarantees peak performance. You’ll notice a difference in your culinary experience once you start implementing these techniques into your routine. Recall that the best ally of a cook is a sharp knife. So, take the time to care for your serrated knives, and they will serve you well for years to come.
Frequently Asked Questions
Q1: How to sharpen serrated knives at home?
Answer: You can sharpen serrated knives at home using an electric sharpener or a honing rod specifically designed for serrated knives.
Q2: Can I use a regular knife sharpener on my serrated knife?
Answer: No, it is best to use a sharpener specifically designed for serrated knives to avoid damaging the blade.
Q3: How often should I sharpen my serrated knife?
Answer: It depends on how frequently you use it, but as a general rule, it is recommended to sharpen your serrated knife every 6-12 months.
Q4: Can I sharpen a severely dull serrated knife?
Answer: Yes, but more time and work will be needed. It’s best to regularly maintain your knife to avoid severe dullness.
Q5: Are there any safety precautions I should take when sharpening my serrated knives?
Answer: Yes, always follow the manufacturer’s instructions carefully and wear protective gloves if necessary. To prevent mishaps, you should also ensure that your workspace is well-lit and trouble-free.
Disclaimer: This page only includes content that is intended to be educational. Always exercise caution and follow manufacturer guidelines when sharpening knives. If the information provided is used improperly, the author and publisher will not be held liable for any harm or damages.
Personal Experience: In my years of culinary exploration, maintaining my serrated knives has been a game-changer. I once struggled with a dull bread knife that crushed instead of sliced. Learning to sharpen it with a ceramic rod not only improved my cooking efficiency but also enhanced my overall kitchen experience. Each slice became precise, clean, and effortless.
Why Trust Our Content?
Our content is meticulously researched and written by culinary enthusiasts and experts with years of experience. We prioritize accuracy, practicality, and reader benefit. Our aim is to give you practical insights that enhance your abilities and self-assurance in the kitchen.

